Sunday, December 21, 2014

Cookie Dough Dip- Welcome back to blogging!

It's the holiday season and only 4 days til Christmas! This weekend, somewhere in the midst of our annual family Christmas day downtown, baking, caroling and watching Elf,  Emily suggested I bring my blog back to life. Not really sure why I let this go, but I have to admit I've missed it! And I have been thinking about it for a while myself, so as a Christmas gift to you I'll try to post a few times over the next 2 weeks of my vacation. Wish me luck!

When I was looking thru the recipes I have already posted, I tried to do a little cleaning up and clarifying to make things easier to find.  I'm adding the recipe names to each blog post title so hopefully that will help a bit. While I was at it I discovered several unfinished "drafts".  This one seems like it might come in handy at this time of year, because you know...you might need to bring some food to an upcoming party, or to a get together, or to put out in the break room at work, and this is a very yummy, quick & easy recipe that will work for any of those situations! Hope you and your friends like it! So..., my next post will be much better, but for now I'm  looking forward to celebrating with you both and wishing you a Merry Christmas!

Cookie Dough Dip Recipe
Prep Time: 10 minutes
Total Time: 10 minutes
Yield: 12
Ingredients:
  • 1 8-ounce package cream cheese, softened
  • 1/2 cup butter, softened
  • 1 cup powdered sugar
  • 2 tablespoons brown sugar
  • 1 1/2 teaspoons vanilla
  • 1 cup chocolate chips
  • 1 cup toffee bits
Instructions
  1. Cream together cream cheese and butter.
  2. Add all remaining ingredients and mix until well-combined.
  3. Serve with graham crackers or apple wedges.

Saturday, March 3, 2012

Top Chef! Pumpkin Risotto

One of our favorite TV shows is Top Chef.  We love watching this cooking show competition that features up and coming restaurant chefs who are judged by amazing, well known chefs and foodies.

We were delighted when Chicago's own Rick Bayless won the Top Chef Masters season!  We have eaten at several of his restaurants, Frontera Grill and Frontera Fresco.  His Topolobampo and XOCO are on my list of places where I'd love to dine.  And I just discovered he has added locations at O'Hare called Tortas Frontera, finally a good reason to get stuck at the airport!  I also enjoy cooking with his Frontera and Salpica lines of food products. 

Another Top Chef winner has a restaurant in Chicago.  Stephanie Izard, winner of season 4, owns Girl and the Goat.  Emily has reservations there in April!  The menu looks great and I'm looking forward to hearing all about it! 

I was reminded of all of this as Ty and I watched the finale of Top Chef Texas this past week.  Spoiler Alert!  Scroll past the photo if you haven't finished watching this season!  We were so happy that Paul earned the title of Top Chef and Sarah was sent to pack her knives!  This show seems to be a great launching pad for good chefs whether they win or lose, so I'm guessing we may hear more about many of this seasons contestants, several of whom are currently working in Chicago.  For example, yesterday we saw cheftestant Chuy Valencia on Diners, DriveIns and Dives.

While Dad and I were in DC we stumbled upon the restaurant of another former contestant of TC, Mike Isabella.  Mike has been on several seasons and has yet to win, but I talked Dad into giving his restaurant, Graffiato, a try.  It was easily the best food we ate in our nation's capitol!

Among the things on the menu that we sampled the White House flatbread pizza was smothered with mozzarella, taleggio & ricotta cheeses and topped with prosciutto and black pepper honey!  I really need to try recreating it at home.  We also enjoyed the pumpkin risotto with smoked provolone and pepitas. When we got home I made my own version several times and learned that risotto isn't as hard as I had thought, it just takes time and attention to do it right. 


Here is my version, with help from Wolfgang Puck.   I substitute 1 cup canned pumpkin for the squash.  The parmesan cheese tastes great but smoked provolone would be delicious as well.
Pumpkin Risotto

Ingredients

  • 1/2 cup extra-virgin olive oil
  • 1 cup finely chopped onion
  • 1 tablespoon chopped garlic
  • 2 cups arborio rice
  • 1 cup dry white wine
  • About 6 cups of hot chicken stock or vegetable stock
  • butternut squash, one half baked in the oven and then pureed; the other half, peeled, cut into small dice, and Sauteed in a little oil and butter until tender
  • 1/2 cup grated Parmesan
  • 4 tablespoons unsalted butter, cut into small pieces

Directions

In a medium-size heavy saucepan, heat the olive oil over medium-high heat. Add the onion and garlic and saute, stirring continuously, just until softened, 3 to 4 minutes. Add the rice and continue to stir, using a wooden spoon, to coat the rice with the oil.
Add the white wine and continue cooking, stirring often, until it has been absorbed by the rice. Pour in enough chicken stock to cover the rice completely, about 3 cups, and continue to cook, stirring often, until all the liquid is absorbed.
Pour in 1 cup more of the remaining stock and stir and cook until it has been absorbed. Repeat with 1 more cup. Add the remaining cup and cook, stirring, until the rice is al dente, tender but still very chewy, and most of the liquid has been absorbed.
Stir in the pumpkin puree and the diced pumpkin and reduce the heat to very low so that the risotto doesn't simmer anymore. Stir in the Parmesan and butter to give the risotto a nice, creamy finish. Spoon it immediately into heated shallow serving bowls.
Start saving your pennies, Sarah, Beverly, Chris and Ritchie are all chefs here in Chicago!  Looks like we could sample some Top Chef fare without having to travel very far.  Cheers!

Tuesday, December 13, 2011

Cardamom Bread


Today is Santa Lucia Day!  And ever since we moved to Northbrook this day is filled with special memories.  Our church celebrated it with a breakfast and pageant each year and the ladies wasted no time recruiting our little family.  Here is a picture of Em in the Lucia Choir the first year we were here.  
Both of you sang in the Lucia choir on the first Saturday morning in December for many years.  Of course this meant that you had practiced the songs for many weeks beforehand.  Janet Gundlach, the Lucia choir director, coaxed you children into learning a crazy version of something that sounded a lot like Swedish.  And when you sang your voices sounded like angels in that candle lit room.   


So much preparation went into those mornings, everyone in the church helped in someway. Publicity and ticket sales, Butik and bakery items to be sold, the kitchen crew, decorations and parking lot attendants and of course all the children performing! 


Ty had a turn being one of the children to sit by the "Grandmother" to listen as Laurie Johnson sang "Lissna".  He also got to be the Star Boy one year.  Emily sang in the Lucia Choir and then moved up to be one of the Swedish dancing girls.  It wasn't always fun for you.  Ty quickly out grew wanting to be in the choir.  And almost every year Em and I scrambled to find a pair of red tights that her fit comfortably.


                       I worked in the bakery and then the Butik, finally I was in charge of ordering all the merchandise to sell and also co-chairing the event with Sarah Mohr.  One year I even got to be Lucia!


The morning was magical and I hope you will always have good memories of those special days.  For me, Lucia will always signal the start of the Christmas season!
One of the special treats served at the Lucia Breakfast was cardamom bread.  Now, I have never had any luck with yeast bread baking.  But, one day when Deb Cowger and I were talking on the phone, she told me she was baking cardamom bread and I decided if Deb could do it, then so could I!  So I found a step by step recipe online and have used it with no problems for several years.  If you have lots of time and a stand mixer, you too can bake some yummy cardamom bread.  Happy baking and God Jul!


Cardamom Bread
Ingredients
  • 1 1/2 Tbsp instant yeast
  • 4 cups flour
  • 11/4 cups lukewarm milk or water
  • 3/4 cup melted butter or oil
  • 3/4 cup white sugar
  • 1 egg, lightly beaten
  • 1 tsp salt
  • 1 tsp ground cardamom
1.)  Mix flour, yeast, and cardamom in your mixing bowl.  Set aside.  Eat some Christmas candy.  You deserve a reward.
2.)  Heat milk and stir in sugar until dissolved.  I like to do this in a 4 cup glass measuring cup but do whatever makes you feel like dancing.
3.)  Add the milk and sugar to the flour mixture.  Add 1/2 cup melted butter or oil, too.  Mix on low (if you are using a mixer) until a nice sticky dough forms.


4.)  Change out the mixer blade and use a dough hook.  Knead for a few minutes and then stop.  Let the dough rest for about 20 minutes with a light cover over it (I use a plate and just stick it over the top of the mixing bowl).  This is called autolyse (sounds like auto-lease) and is nap time for the dough during which the gluten relaxes and absorbs moisture.
5.)  During the autolyse, I wash the dishes and paint my baking pan with rest of the melted butter (or oil).  When the twenty minutes is up, begin kneading again and knead in the salt.
6.)  Turn the dough out onto a lightly floured surface and divide it into 6 equal parts.  Let them rise for about 30-45 minutes.  Roll the dough balls into ropes and braid them into 2 loaves on the greased baking pan.  Tuck the ends of the braids under.  Sneak another piece of candy.  I won’t tell.
7.)  Preheat oven 350 degrees Fahrenheit.  Brush the braided loaves with egg and sprinkle it with sugar.  Bake until golden brown (about 30 minutes).


P.S. Happy Birthday Uncle Chuck!


Tuesday, November 15, 2011

Spicy Thai Noodles

Our family enjoys good Asian food.  Last night (sorry, I'm a bit slow getting this posted) Dad and I went out with Josh and Christine Anderson to an Asian restaurant in DC.  Dad and I walked across downtown DC to the restaurant (lots of fun in my "boot", sooo glad to be back in regular shoes now!) Josh and Christine rented bikes and rode there from their hotel.  Afterward, Dad and I took a taxi to the MLK Jr Memorial, which was beautiful at night.  It was a fun night!  The restaurant food was good, but not as good as one of our family's favorite places, Big Bowl.  It has become a special occasion spot for us to celebrate:  Em's Sweet 16 party, also your graduation from NPU and most recently Ty's birthday, 3 years and running.
We each have our own favorite dishes there, but we all enjoy one appetizer from their menu, the spicy peanut noodles.  The noodles are served cold and the sweetness of the peanut buttery sauce is cut with a touch of peppery hotness which is cooled with a side of shredded cucumbers and finished with a taste of cilantro.  I haven't been able to recreate their yummy version but this recipe comes pretty close.  I tried to make the noodles while Auntie Lou was in town, but our pantry was low on both peanut butter and soy sauce so the result was not so good.  Here is the recipe I have adapted for a variety of dishes both hot and cold.  It's not as good as Big Bowl's but it gives us a taste of a favorite restaurant dish at home!


Spicy Thai Noodles


Yields: 6 servings
¼cup smooth peanut butter
2tbsp lemon or lime juice
¼cup soy sauce
1tsp red pepper flakes
3tbsp sesame oil
10drops hot chili oil
1pound spaghetti, linguine or other thin pasta
¾cup olive oil
8green onions, trimmed and cut diagonally into ½-inch pieces
cup cilantro, chopped
2tbsp chopped peanuts
To make the sauce, whisk together until smooth the peanut butter, lemon juice and soy sauce. Then blend in the red pepper flakes, sesame oil and hot chili oil and set aside.
Cook the pasta according to package directions until done and then drain thoroughly. Toss with the olive oil. Let sit until cooled to room temperature, tossing frequently to prevent sticking and clumping. When cooled, pour the peanut mixture over the noodles and toss to coat.
Add green onions and cilantro leaves and toss to combine. Mound noodles on a platter to serve. Garnish with chopped peanuts.

The noodles are good served hot with stir fry (don't heat the sauce) or cold with chicken over a bed of lettuce with an Asian or fruity salad dressing.  Yummmy! I'm already looking forward to our next Big Bowl "celebration"!

Wednesday, October 19, 2011

Auntie Lou's Quiche Lorraine

Auntie Lou's Quiche Lorraine
Dad and I are on a plane flying to Washington DC.  It has been a busy week for me, we did vision and hearing screening for the entire school.  I haven’t had much time to reflect on the wonderful visit we just had with Auntie Lou, so I am really grateful for this 1 ½ hour flight to look back on her visit. 

Lou called just a few weeks ago and asked if she could come to visit.  What a wonderful surprise!   We had thought we would get to see Auntie Lou and Uncle Chuck at Stefanie and Chad’s wedding in December. But then came the exciting news that Kate and Phil were having a baby in November! The Largents wouldn’t make it to the wedding after all.  I’ll admit that while I was really excited for the entire Largent family, I was feeling a bit sad that I wouldn’t get to see my sister/friend Lou!  So it was a special gift to have Lou visit for almost a week of walking and talking and shopping and talking and eating and talking and hot tubbing and talking.  As a bonus, it was a really great recharge for me that after 6 weeks in my boot cast I got it off just in time to enjoy her visit!  (Let’s ignore that fact that the boot is back, maybe it will  just go away.)

I am so lucky to have a sister-in-law that I enjoy being with as much as your Auntie Lou!  Plus, she is married to a really great guy that we all love!  I look forward to any visits we get together, and hopefully we will all have a great spring break together in Washington State! 

While Lou was here she made some really great “breakfast burritos” that the guys loved.  They were filled with scrambled eggs, sauteed peppers and onions, bacon and cheese, topped with salsa. I need to ask her to be a guest author sometime so you can have her recipe! 

All this egg talk got me thinking about growing up on the farm. We raised chickens.  Aunt Shirley and I had the job of feeding the chickens and gathering the eggs.  It was mostly a fun job.  But every now and then there would be a chicken that would scare us.  I remember a rooster who we tried to avoid.  He was missing part of his waddle, the floppy red tabs that hang down under a rooster’s beak.  He only had 1 tab instead of  2. This made him easier to pick out in a crowd of chickens.  Plus, he was an angry bird! He always saw us coming and tried to chase us off, pecking at us if we got close enough.  One time he chased us all around the barnyard.  What a sight, two little girls screaming and running from a rooster with a defective waddle! 


I have never been a lover of some egg dishes, for instance I’ll pass on fried and scrambled. But I do enjoy a good quiche!  Auntie Lou gave me a great basic recipe years ago and I have stuck with it, making changes depending on what we have on hand. I baked this quiche for Ty to enjoy while we are away, except I used cheddar instead of Swiss cheese.  It is so versatile, it’s great served hot or cold and can just as easily be toted in a lunch bag or served for brunch.  Hope you enjoy making some quiche and thinking of your sweet Auntie!

Quiche Lorraine

Preheat oven to 400 degrees
1 deep dish (9”) pie shell (I buy the frozen crust which comes in a pan or refrigerated Pillsbury crust which you put in your own pan)
½ lb bacon- fried and crumbled (*see note below for baked bacon)
½ lb cheese, shredded

Egg batter:
4-5 eggs
1 ½ cups milk or 1 cup buttermilk + ½ cup milk
salt and pepper to taste


Layer the cheese and bacon into the pie crust filled pan.  Mix the batter well in a medium bowl and pour over cheese in pie pan.  Bake for 30-40 minutes or until set.

Thanks Lou, we love you!  See you in March!!!


* Try baking your bacon!  It is less messy and your oven will be hot and ready for your quiche.  
Preheat oven to 400 degrees (some people skip the preheat).  
Line a large pan with tin foil, like a cookie sheet with sides,  be sure to cover the sides.  Lay the bacon strips on the foil, they can touch or overlap a tiny bit.  Bake for 15 to 20 minutes until desired doneness, check often near the end.  Remove bacon from pan when done and throw away foil.  You may need to adjust time or temp with very thick or thin bacon. Super easy!  

Sunday, July 10, 2011

Uncle Chuck's Granola

In June the Anderson aunts came to Chicago for our 2nd annual "Sisters Trip"!  Last year Aunt Shirley, Aunt Janice and I met in Minneapolis for a few days and we had a great time.  This year Aunt Jana joined us too!
We had some hot and stormy weather but luckily we were not without power like the rest of Northbrook.  It was fun to be a tourist with the girls in my hometown, we got to see lots of Chicagoland!
 I am enjoying getting to know each other with these extended visits and I wish we had started getting together years ago.  It is great to be "just us girls" (for the most part since Dad and Ty as well as Em and Kelly joined us for a few meals).  When its "just us girls" we can do the things we feel like without needing to worry about what our husbands or kids might choose.  We spent some time talking about our families of course but it seems we were mostly getting to know each other and catching up. 
The Anderson Girls in Andersonville!
I'm looking forward to next year, Aunt Shirley is checking into an
"Anderson Girls meet the Amish" trip!

While the aunties where here I served them Uncle Chuck's Granola and they seemed to like it. I think Uncle Chuck has made it for years, I remember eating it in Duluth at Grandma's sometimes when the Largents were in town.  I fell in love with it when we all stayed together for Kate and Phil's wedding.  Uncle C shared his recipe with me shortly afterward.  It makes a lot but Dad and I go through it pretty fast!  We like on yogurt, as cereal with fruit, sprinkled on pancakes or as a topping for ice cream!

Aunt Shirley sent me a text message asking for the recipe so I thought I'd share it with you, too.  I've made a few adaptations (Ty likes less coconut, Dad likes more sweetness, etc)  from the recipe Uncle Chuck sent me, I'll mark those items as optional in case you'd like to stick to the the original!
Uncle Chuck's Granola

1 small box old fashioned oats or 1/2 large box
1  pkg shredded coconut (I use1/2  of a small pkg for Ty) 
Nuts (Any variety and amount you like. I usually use 1 bag of chopped walnuts or pecans with 1 bag sliced almonds and pine nuts)
Seeds, sesame or sunflower
3/4 cup ground flax seed, opt.
1/3 jar wheat germ, opt.
1 tbls cinnamon
1/2 cup oil
1/4  to 1/2 cup honey
1/4 cup brown sugar, opt.
1/2 tsp salt, opt.
2 tbls vanilla

 Preheat oven to 325.  Toast the coconut on a cookie sheet. Watch it, it is easy to burn, about 10-12 minutes.  Stir once. (Careful! My eyes always sting at this point when I open the oven!)
You may wish to pre- toast some of the nuts on the stove top, this really brings out the flavor of pine nuts, etc.  
Mix the coconut with the oatmeal in a LARGE bowl, it grows. Add the nuts, seeds, cinnamon,  flax seed and wheat germ.
Mix the rest of the ingredients together, you can micro 30 seconds to help blend together.  Add the liquid to the oat mixture.  Use a heavy spoon and stir well.  
Spread onto cookie sheets and bake in small batches for about 8 to 10 minutes, stirring once.  Let it get a little brown but watch it.  It can go from a nice brown to burnt real fast. 

Tips from Uncle Chuck: If you do burn a batch and it isn't too bad, you can add it to the other batches to blend in.  Let it cool and keep in airtight containers.  You can add dried fruit after it has cooled if desired. Adding a bit more honey works as a good binder and sweetener.  This is so much cheaper than health store granola.  Its fun to add different stuff.  Makes great gifts too!  Enjoy!
Uncle Chuck enjoying "the Bean" in Chicago!


Thursday, February 17, 2011

Happy Birthday Emily! Chocolate Chip Cookie Dough Cheesecake

HAPPY BIRTHDAY EMILY!!! 
Wow!  Seems like we just brought you home from the hospital, a tiny little baby all wrapped in blankets.  How did the years go by so fast?!?!?  I can't believe you are turning 24 today. It has been 24 wonderful years for your Dad and I, we are so grateful to God for letting us be part of the lives of two fabulous children!  Because I'm a sentimental mom, I've been looking back at birthday photos.  Here are a few I'd like to share with you.

Here you are celebrating your first birthday at the Tonn's. Harriet made your cake!  We also had a "party" with Donald Mathers and Steven Langmaack, you were all born around the same time and celebrated birthdays together for years.  You took your first steps on the day you turned 1 year old. 

We spent your second birthday at the Minnesota Zoo with Aunt Shirley and Uncle Dwight.  You loved going to see the animals.  Looks like you had a Rice Krispie treat for a b-day cake! 

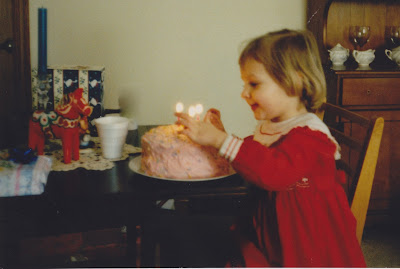
Be careful blowing out those candles Sweetie!  We celebrated birthday number three with family on the Sunday that Tyler was dedicated at church.  What a big day!  You loved being a big sister! 

On your fourth birthday you celebrated with Kelly and your little friends at a "Peter Pan" party.  Aunt Shirley painted the cake topper for your cake!  You still have it in your room and Peter Pan is still one of your favorite books!

Last year we celebrated your special day with our "in-town family".  I am so grateful for all the people, family and friends, in your life who have surrounded you with love.  As you celebrate today, remember YOU ARE LOVED!

Part of your celebrating in the past few years has included cheesecake.  Today will be no different.  Chocolate Chip Cookie-Dough Cheesecake has become one of our favorite recipes and it is definitely celebration worthy!  Enjoy it tonight with your friends! Happy Birthday Emily!!!


Chocolate Chip Cookie Dough Cheesecake

Ingredients

  • 1-3/4 cups crushed chocolate chips cookies or chocolate wafer crumbs
  • 1/4 cup sugar
  • 1/3 cup butter, melted

  • FILLING:
  • 3 packages (8 ounces each) cream cheese, softened
  • 1 cup sugar
  • 3 eggs, lightly beaten
  • 1 cup (8 ounces) sour cream
  • 1/2 teaspoon vanilla extract

  • COOKIE DOUGH:
  • 1/4 cup butter, softened
  • 1/4 cup sugar
  • 1/4 cup packed brown sugar
  • 1 tablespoon water
  • 1 teaspoon vanilla extract
  • 1/2 cup all-purpose flour
  • 1-1/2 cups miniature semisweet chocolate chips, divided

Directions

  • In a small bowl, combine cookie crumbs and sugar; stir in butter. Press onto the bottom and 1 in up the sides of a greased 9-in. pan. Place pan on a baking sheet; set aside.
  • In a large bowl, beat cream cheese and sugar until smooth. Add eggs; beat on low just until combined. Add sour cream and vanilla; beat just until blended. Pour over crust; set aside.
  • In another bowl, cream butter and sugars on medium speed until light and fluffy. Add water and vanilla. Gradually add flour. Stir in 1 cup chocolate chips. Drop dough by teaspoonfuls over filling, gently pushing dough below surface (dough should be completely covered by filling). Place pan on a baking sheet.
  • Bake at 350° for 45-55 minutes or until center is almost set. Cool on a wire rack for 10 minutes. Carefully run a knife around edge of pan to loosen; cool 1 hour longer. Refrigerate overnight.
  • Remove sides of pan. Sprinkle with remaining chips. Refrigerate leftovers. Yield: 12-14 servings.